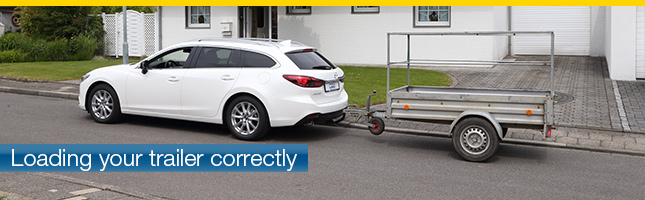
Three features that the towbar should have for retrofitting

12. Dezember 2018 um 11:19

Retrofitting towbar
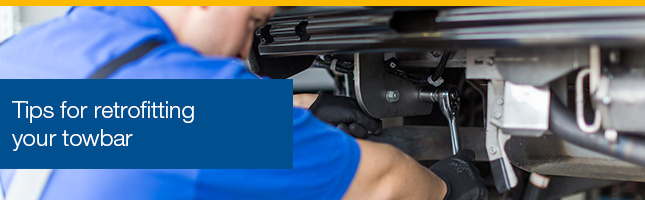
If you want to retrofit a towbar, you should pay attention to a few details. Clearly, you want to be able to use the AHK for a few years on your current vehicle and you do not want it to annoy you on a regular basis. Therefore, we have put together the three most important features that you should consider when choosing the towing hitch.

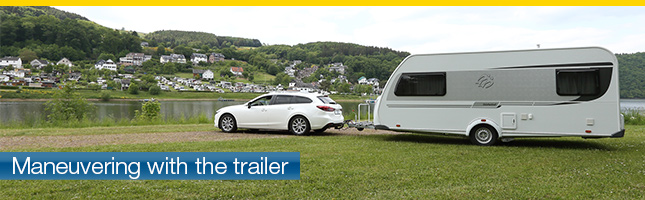
1. The towbar should not be in your way

Nothing is more annoying than constantly bumping your leg on the trailer hitch because you have forgotten that it is now on the back of the vehicle. Surely you will get used to it one day. Yet, if you are a habit and are bothered by something in your way, then you should think about a detachable or swiveling towbar. These are not permanently in your way and only need to be put into operation when you really intend to use them. This way you save not only trouble, but also dirty trouser legs, if, after retrofitting you forgot about the towbar again.


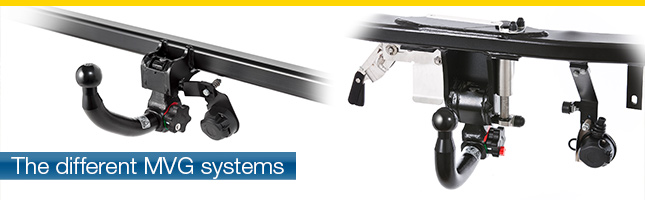
2. The trailer hitch should lie to you in the operation

If you are retrofitting a trailer hitch and it is not exactly rigid, then you should make sure when retrofitting that you get along well with the operation of the trailer hitch. With our detachable trailer hitches, you just have to turn one wheel aside and turn it to remove the ball rod. During assembly, you only need to guide the ball rod into the receptacle until it snaps in by itself. Even with the swivel trailer hitch from us only a few steps are necessary. So you have to operate the trailer hitch as described for the removable version, if you want to dismantle the towbar. If you have operated the wheel, the towbar „falls“ down and you only have to bring it up to its resting position. If you would like to put the towbar back in operation, you will move the lever of the rest position to the side so that the ball bar „falls down“ once again. Then you only have to grasp the trailer hitch and guide it to its correct position. Here, too, the towbar locks itself in. So you see, the operation of our towbars is designed as easy as possible for you, we put a lot of value on it in the development and construction.

3. The trailer hitch should not affect the appearance of your vehicle

Nothing is nastier than a large section in the bumper, if you retrofit a trailer hitch. It is by no means absolutely necessary to reckon with a section when retrofitting. Our trailer hitches are designed to come out under the bumper and thus run around it. A section in the visible area of ​​the bumper is therefore not required when retrofitting with MVG trailer couplings. When buying your trailer hitch you should also pay attention to this, certainly you would like to make on your vehicle no major interference with the optics.

When is an activation required for retrofitting?

8. November 2018 um 11:10

Activation of the electrical kit
In order to ensure that the towing vehicle later communicates correctly with the trailer and that the lighting equipment does its job without error, the correct installation of the electrical kit with an activation is important. This should best be done by a specialist, especially with regard to the ever more complex electronics of the vehicles.

Activation is required above all for newer vehicles equipped with a CAN data bus. The activation must be carried out properly to ensure the complete functions of the electrical kit at the next trailer travel. Often notes regarding the retrofitting and activation of the electrical kit are given  in the operating instructions of the vehicle manufacturer, in the specialist workshop, the responsible staff usually knows how to perform the programming and unlocking and are equipped with the necessary funds.


What happens if the activation of electrical kits is not done?


If you do not let the electrical kit unlock, it will be difficult with the trailer. After all, all flashing and light functions on the trailer are important for safe driving with the trailer in order to be able to participate safely in traffic. These functions can only work properly by unlocking. For example, this ensures that the rear fog lamp is switched off when the trailer is being used on the vehicle and that it works on the trailer. If the activation does not take place, both rear fog lights shine. Often when driving with the trailer there are acoustic and electronic signals, for example when flashing. These will also be eliminated if your electrical kit is not installed correctly, but this is more likely to involve electrical kits with audible or electronic flashers.

Safe loading for the drive with trailer

11. Oktober 2018 um 10:02

LoadingBefore driving with the trailer, it is important to also deal with the cargo. Finally, this can affect the driving behavior of the trailer. If you’ve gone through the checklist, you’ll also be dealing with the cargo and loading it within the trailer. Maybe you have already loaded the trailer, but maybe you also have to accommodate some parts. It is important to be clear about a few points. The center of gravity of the trailer is usually centered, slightly ahead of the axle. It is important when loading not only to know where the center of gravity is, but also to plan it when distributing the load. Above all, you should pay attention to distribute the load evenly at the center of gravity and around the center of gravity. Better you load the goods a little further forward than too far behind. If you overload the rear part, there will be a negative vertical load, which can cause the team to skid during the ride.

In addition, you should make sure that large, heavy cargo pieces are stored as far down the ground as possible. A lying cabinet is easier to transport than a standing, finally, this cabinet springs from movements and can move its own focus unintentionally, for example, when driving around a curve. On the other hand, if the cabinet is transported horizontally, the center of gravity of the cabinet is also significantly lower, significantly reducing the handling of the trailer and the entire yoke. It is also important that you always secure your cargo well. Lashing straps and nets are a good way to secure loads, and in the worst case, even the smallest of loads can become dangerous missiles. Even cartons with books in a move are heavy and can adversely affect the trailer, so you should load them in the trailer safely so that the range of motion is limited, in case of doubt, it is best to use safety straps.

The license plate for the rear bicycle carrier

26. September 2018 um 9:23

license plate
If you are traveling with a rear bike rack, you must also have a license plate number for your rear bike rack. This is a so-called sequential indicator. It does not differ from your license plate and is basically a duplicate.

That’s why you need a license plate for the rear bike carrier


Such a sequential indicator is always important if the existing is concealed on the vehicle. This can be the case, for example, by loading with a transport box for the trailer hitch or just with the widespread rear bicycle carriers. It does not matter if the rear bike rack covers everything or if it is still partially visible, you must always plan a follow-on license plate when using a rear-wheel carrier. It’s best to pay attention when buying the carrier that it also has a license plate holder so that you can mount the required license plate as well. In many countries, the absence of the successor mark is punishable, so it is important to be prepared before going to Switzerland for example26. Also in Austria you should prepare yourself and assemble your successor license plate on the rear bicycle carrier. Basically, a missing license plate can also be punished in Germany.

Also make sure that the lights on the vehicle are often covered by the transporting bicycles. In road traffic, the other road users can not see your taillights and turn signals so it is important to use a lighted rear bike carrier.


Get a follow-up license plate for your rear bike carrier

If you buy a rear bike carrier, you should get the following number plate immediately. Since this requires no stamping, you can usually save long waiting times. Just have your license plate duplicated at your local contact point, as a rule a number of providers are based at the Traffic Office, so you can get the license plate there at short notice. The waiting times on site are individual, but usually very low. Often ordering on the Internet is no problem, so you even save the way to the office. 

Checklist before driving with the trailer

12. September 2018 um 16:47

checklistBefore you start moving with your trailer, you should go through and check certain items from your checklist. We have put together for you the most important points that you should absolutely check before leaving, so that you are well prepared for the next ride with the trailer.


Our checklist: These points should be checked before driving with the trailer

  1. Make sure that the trailer’s ball coupling is actually snapped onto the tow bar’s ball bar. Many tags have a tag to detect, so you can be sure that everything is correct – even if you may not hear the click sound.
  2. Be sure to check the turn signals and lights before starting. Due to the electrical kit towing vehicle and trailer are electronically connected to each other, whether everything is working properly there, you should check before every trailer ride by checking the flashing and light functions. In addition, you should also take a closer look at all the reflectors, are they perhaps too polluted?
  3. Is the safety rope correctly attached to the vehicle? In some EU countries, this requires specific brackets. How to fasten the tear-off rope correctly, we present you in our post.
  4. Have you kept all the values? When driving with a trailer, the vertical load that the vehicle and the trailer hitch allow should not be exceeded. The trailer hitch can often „endure“ more than the vehicle, but the lower value is decisive.
  5. Make sure you get your cargo right before starting. Large heavy parts should be down, the weight should be basically evenly distributed and nothing should be able to fly back and forth. This can change the driving behavior of the trailer while driving and you can quickly lose track.
  6. Finally, you should go around the whole trailer again. Is the handbrake released? Is the jockey wheel cranked up? Are possible flaps closed? Are the 12 in good shape? You should be able to check all these points at a glance and keep an eye on the tires for driving in different weather conditions.


Now you only have to adjust the interior mirrors on the vehicle and if necessary put the additional mirrors into operation. Then you have already completed the checklist, you can go and start your trip with the trailer. Good ride!


Explaining the MVG systems 2010, 2040 and 2080

24. August 2018 um 16:28

MVG systemsWith our products, you often come across the number codes 2010, 2040 and 2080. We explain what the codes actually stand for and where they are relevant for you. The codes refer to MVG systems. These designate different models of trailer hitches, but give no further information as to which vehicle the system is suitable for.


The MVG systems explained in a simple manner

The system 2010 – always ready with the rigid trailer hitch

It is probably the easiest system to explain. The code 2010 designates the rigid trailer hitches at MVG. The ball bar is firmly welded to the cross member. On some models we also offer  an optional replaceable plate system. Here you can exchange the rigid AHK on a removable plate for a jaw clutch and are flexible as you can attach a variety of pendants. This is often helpful, especially for powerful models like the current pick ups.

YouTube

Mit dem Laden des Videos akzeptieren Sie die Datenschutzerklärung von YouTube.
Mehr erfahren

Video laden


Our system 2040 – mounted in no time

The System 2040 is the successor of the System 2020, both codes stand for our removable system. With our detachable trailer hitches, you can remove the ball bar at any time flexibly and store it when not in use in the trunk. To remove the ball rod, you simply operate our wheel. The assembly is easy and you can take the towbar in no time in operation. Also, the socket holder is foldable, so you can not see anything on the vehicle, if you do not use the trailer hitch.

YouTube

Mit dem Laden des Videos akzeptieren Sie die Datenschutzerklärung von YouTube.
Mehr erfahren

Video laden


The System 2080 – the swiveling solution for your vehicle

With the code 2080 we refer to our swiveling trailer hitch. You can not remove the ball bar, but the ball bar can be pivoted away when the trailer hitch is not needed. It disappears inconspicuously behind the bumper. Also, the operation is done for you via a hand wheel. It only takes a few steps to assemble the ball bar and also to disassemble it again. Again, the socket holder is simply foldable, so that the AHK is not noticeable when it is not needed.

YouTube

Mit dem Laden des Videos akzeptieren Sie die Datenschutzerklärung von YouTube.
Mehr erfahren

Video laden

Reversing made easy: 5 tips for maneuvering with the trailer

31. Juli 2018 um 16:12

Maneuvering
Maneuvering with a trailer, parking and normal driving is often not as easy as one would wish. For driving with a trailer, you do not only have to get used to the big yoke, but also always pay attention to the restrictions of the driver’s license.

Even with practice, maneuvering and reversing with the trailer is often the most difficult t ask. To make sure that this is no longer a hurdle, we have put together five tips that make reversing with a trailer easier and prepare you for the next shunting.


What you should look out for when maneuvering

  1. Before you start driving and, for example, place the trailer in a parking space, you should make sure to adjust your mirrors so that you can see the trailer well. You may not neglect the interior mirror, this is of course much less used than usual, but it can be a help when reversing, since you can watch the trailer well in there and you can make out landmarks on the trailer. Of course, you might alreday know this from attaching, once you have no helper, attaching through landmarks on the trailer becomes easier even without help.
  2. When going backwards, make sure you drive slowly and steer. The smaller the trailer, the more it reacts to your steering movements. So, if you slow things down a bit, you can avoid the trailer suddenly taking a position that you either could not predict or could not easily undo. If you are slow, you can brake at any time and react to movements of the trailer.
  3. If you are not sure about the distances when parking, you should get a referrer to help you. If you do not have anyone, get out in between and see how much maneuvering space you still have.
  4. Make sure the angle does not get too steep when reversing. Because the steeper the angle is, the more elaborate is the parking in the parking space for you. If possible, drive a bit farther away from the parking space, then relax in a gentle arc.
  5. When choosing the parking space, you should make sure in advance that this is not only big enough, but you also have enough space to maneuver. Consider the length of your team and act accordingly anticipatory.

The warning functions of electrical kits: C2 controll lamp and warning devices

4. Juni 2018 um 13:45

C2 controll lampEvery obstructed electrical kit offers the opportunity of being warned in case of a dysfunction, using a C2 controll lamp or another warning device. If, for example, a flashing light is broken at the trailer, your car will behave different than usual and the indicator lamp will indicate the malfunction and give a warning. We are going to explain to you, which indications there are, how they are shown with different eletrical kits and what you have to know about indicator lamps. Of course, these functions and indications suit legal regulations, which serve your security and must be taken into consideration already during developing and conceptualising the electrical kits.

Which tasks does a C2 controll lamp have?

A C2 controll lamp serves the surveillance of the flashing lights at the trailer and shows you as the driver if these lights function correctly. Therefore, the c2 controll lamps must always be installed within the visual field  of the driver in the cockpit. It blinks in the same rythym as do the flashing lights at the trailer and thus shows you, whether or not the lamps function correctly. If it blinks faster or not at all, a malfunction is indicated and you know that the trailer lamps must be corrected for a proper functioning.

How does an electronic warning device work?

In contrast to the C2 controll lights the electronic warning device is only activated when a malfunction is taking place. If a flashing light at the trailer fails, it is noticeable for the driver due to a higher blinking frequency.

PDC shutdown: Why a car doesn’t recognise a trailer as an obstacle

30. Mai 2018 um 11:09

PDC shutdownFor some years now the PDC (Park Distance Control) system has been a standard feature of a car. When reversing sensors recognize obstacles behind the car, the board computer gives the driver an optical and/or acoustic signal.
In reality, a trailer should always be recognised as an obstacle, because it is directly at the tail end of the car. The PDC should really go haywire and permanently give warning signals. But it doesn’t – and why not? The reason is that the PDC shuts down, which is realised in various ways.
Heinz Hueber, Technical Manager of our Electrical Kit Department, explains how the Park Distance Control can be switched off with retro-fit trailer hitches and how the PDC shutdown functions.

1. Complete integration into the onboard electronics of the towing vehicle
If a towbar is installed by a car manufacturer in the factory, the electronics will be completely integrated with the onboard electronics of the towing car. Trailer operation is then activated in the board computer so that the board computer automatically knows when the trailer plug is inserted into the socket, e.g. that the car’s PDC and the rear fog light have to be switched off and possibly the trailer combination stabilisation switched on.
If a trailer hitch is retro-fitted the coupling electronics into the onboard electronics of the towing vehicle could also be integrated by a specialist workshop. For this, the control units in the vehicle must be manually activated with a tester (Caution! Not every tester can activate control units). There will be additional costs.
Unfortunately, not all car manufacturers authorise the access to the intelligent board electronics. Sometimes after a service at an authorized workshop the activation is reset. Therefore, the manufacturers of retro-fit trailer hitches solve the PDC shutdown by means of an electronic or mechanical trailer identification.

2. Control module in the electrical kit is used for recognition
A control module is built into the electrical kit delivered along with the towbar. This module detects the electrical load of the trailer lighting and passes on the information to the board electronics accordingly. Here we can latch into the board electronics of the towing vehicle, but without activation. The PDC shutdown is either switched on or off manually via a P-OFF switch, which many cars have, or automatically via an intelligent control module of the electrical kit, which also switches the trailer rear fog light on and off. Disadvantage: further driver assistance systems will not be adapted.

3. Micro-switch interrupts the power supply
The easiest solution is a mechanical micro-switch in the towbar socket. If the connector of the trailer is plugged in the micro-switch bumps off and interrupts the power supply to the PDC. At the same time the rear fog light will be switched off on the towing vehicle – only the rear fog light on the trailer will shine, not on the towing vehicle.

4. Digital communication via databus (CAN)
Nowadays many vehicles communicate via a databus. Here all information is digitally transported via a two-wire cable. The control modules are, connected with one another via the data bus, CAN (Controller Area Network) and communicate the necessary signals via the two cables, CAN-High and CAN-Low.
Technically the latest control modules of the trailer hitches could hook up into the CAN-Bus and communicate digitally with the onboard control units, but this is seldom the case.

Check controll for the electrical kit – what is it and how does it work?

25. April 2018 um 12:17

check controllThe term check controll is omnipresent, especially when it comes to the electronics of a car. But what does the term stand for and what does it mean? The surveillance of the lamps and their proper functioning is labelled as check controll system, the system is part of the vehicle’s on-board electronics. It serves as a controlling mechanism of different vehicle’s functions, part of those are the full beam, stop lights and rear fog-lamps. If these lights and lamps fail, the driver is informed due to the systems optical indications. Hence, the indications can also be digital informations of the board computer.

What must be payed attention to concerning vehicles‘ check controll?

A vehicle’s electronics are not only complicated but also finely calibrated, therefore, even small interventions can have a huge impact. For vehicle’s which entail check controll the electrical kit must hence be conceptualized in a way that ensures the tap of the lighting functions before the lamp test device takes place.

A different solution is to use an electrical kit with a special trailer control device, where lamp currents are generated for the trailer from the vehicle battery out. Incidentally, such a cable set is also strongly recommended for vehicles with too small cable cross-sections (<0.752). We already pay close attention to this when designing and developing our electrical kits. So you just have to make sure when buying that the electrical kit is suitable for vehicles with check-control.

Electric kits with trailer control unit MVG-type 4112

Our electric kits, which are fitted with a trailer control unit of the MVG-Type 4112, are ideally suited for vehicles with check-control and / or with insufficient cable cross-sections (<0.752). You also benefit from the following product advantages:

  • Short-circuit proof outputs of the trailer lighting functions
  • Suitable for both LED and incandescent trailers
  • Microprocessor controlled
  • Monitoring of the charging line / charging active with the engine running and a light function
  • Made in Germany