Park and uncouple the trailer: Pay attention to these points

12. Juli 2021 um 16:02

Parking the trailer
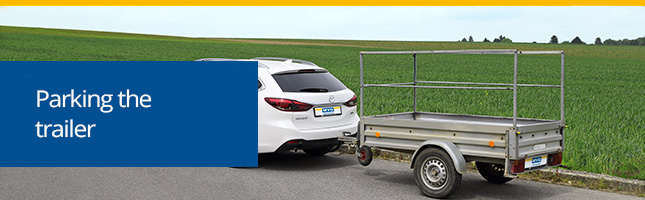
After your trailer ride, your trailer must be safely “stowed away” again. We have put together a few tips for you on parking, uncoupling and securing the trailer, which you should pay attention to when parking the trailer.

This is how you park your trailer

Reversing with a trailer can be a bit difficult at times. As always, it is easiest when you have someone to instruct you. And: practice makes perfect. Reversing works best when you know your team really well and can assess how the trailer will react to your steering movements.
Before parking, you should make sure that the space or gap where the trailer is to be parked is large enough and that there are no obstacles in the way. You should also have enough space in front of you for maneuvering. Clear possible obstacles – if  necessary – out of the way and look for landmarks in advance that you can have a good view of when reversing and help you to position the trailer.

If, for example, you have to hit a gap in a number of other trailers, it can be helpful if you are already trying to move the trailer as close as possible to the gap when you are driving forward so that you don’t have to go as far in reverse. In principle, think in advance what you can already consider when driving forwards in order to make it easier for you to drive backwards. Always avoid hectic steering movements. It is better to stop once too much than too little to make sure that everything fits and that you can get the trailer to stop exactly where you want it to be.

Safety first

When you have parked the trailer, you should first make sure that the trailer is secured and prevent it from rolling away as soon as you have released it from the towing vehicle. Use wheel chocks for this and be sure to tighten the trailer’s brake as a first step. Then dissolve the electronic connection between the trailer and the towing vehicle and clear the trailer’s power cable in the receptacle that is often provided for it. Then crank the trailer’s support wheel down and lift the trailer off the trailer hitch. Only as the last step do you loosen the breakaway cable. This is an important point in your hanging out routine and a final safeguard to prevent the trailer from rolling away. Only loosen the breakaway cable if you are sure that you have completed all the other steps beforehand and that the trailer is safe and secure and, above all, cannot roll away.

Attaching the trailer: The most important steps

2. Juni 2021 um 18:14

Attaching the trailerYou are about to start your first trip with the trailer, but you have not yet attached it yourself? We have a few tips for you and explain the most important steps for securely and easily attaching your trailer.

Driving to the trailer backwards

When approaching the trailer, you should focus on precision and take your time. First, pay attention to where your trailer is. For example, is there a enough space left and right and behind the trailer? Are there possible obstacles that you should not only have in the back of your head, but should also be cleared out of the way beforehand? It is of course easiest if you have a helper whom you can place beside the trailer and who will then instruct you. But even without a helper, you can attach the trailer by yourself with a little practice.

Make sure that you drive as straight as possible in front of the trailer and that your trailer hitch is positioned as centrally as possible towards the trailer. With a little practice, you can also identify landmarks on the trailer that will help you to center the towing vehicle backwards towards the trailer.

You should be careful not to drive too fast. Especially when you are alone, it is better to slowly make your way towards the trailer than to risk a dent in the back of your car. A mark on the ground may help you to better estimate the distance so that you don’t have to get out of the car to check the remaining distance to the trailer. A mirror that you mount on the trailer or a rear-view camera for your vehicle (if this is not part of the equipment already, the camera can also be retrofitted) will help you approach the trailer.

Attaching the trailer

The time has come, your towing vehicle is centered in front of the drawbar of the trailer. Now you slowly crank the support wheel down, making sure that you hit the trailer hitch on the towing vehicle as precisely as possible. On some trailers, cranking down is hindered by the trailer’s parking brake. You should only solve the parking brake once you have made sure that the trailer cannot roll forwards or backwards. It is best to use wheel chocks if you have to release the parking brake early.

If you have cranked the trailer down so far that it is in contact with the towbar, the trailer may jump onto the towbar by itself and lock into place. If this is not the case, you lift the lever on the ball coupling slightly and use it to open the trailer coupling so that you can place the trailer on the trailer coupling and attach it. When you let go of the lever, the ball hitch lock should automatically click into place. To be sure that the lock has worked, you can crank the support wheel up a little. If the trailer does not detach from the towbar, everything is locked correctly.

Security check: Is everything correct?

With the locking of the ball coupling on the trailer coupling, you have already passed the first security check. Then you attach the breakaway cable and plug in the plug for the power connection between the towing vehicle and the trailer. Now all you have to do is check the support wheel and, if necessary, bring it into its parking position, release the trailer’s brake, remove any wedges and you can drive out of the trailer’s parking space. Also, briefly make sure that all lamps and indicators on the trailer are working correctly. Then you are ready for your journey.

You can read about how to correctly secure your load when driving a trailer in our blog post.

Registration for your trailer: the most important information

14. Mai 2021 um 17:51

Registration of your trailer
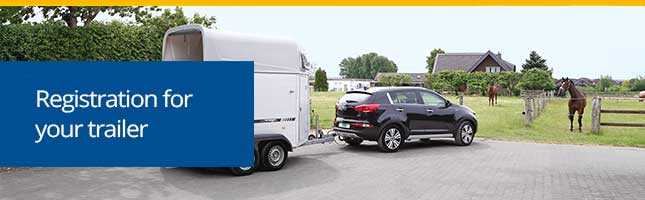
If you get a new trailer, then you should definitely plan the trip to the registration office. A trailer for a car is not registration-free and you have to get official license plates in addition to the registration. In order to get this and to be able to use your new trailer for the first trip, you have to register your trailer. You can only use it in road traffic with a valid license.

These documents are needed for the registration of your trailer

So that your trailer is approved and your new license plates can be issued, you can’t avoid driving to the responsible registration office. When you are on site, you need the following documents so that your approval can be issued: You need the manufacturer’s certificate or confirmation of a valid general inspection by a testing organization such as the German DEKRA or TÜV, which confirms that your trailer is roadworthy. If the “TÜV” has expired, there will be a fine depending on the duration of the overdraft, so make sure that the general inspection is still valid. You should also be able to identify yourself, for example with an identity card. Also have the registration certificate part I and II with you in any case. Finally, you need an insurance code from your insurance company, alternatively you can also bring a double insurance card with you.

No papers?

Even if you don’t have any papers, you can register the trailer, but this is much more difficult. Such an exception is only made if the vehicle registration or registration document has been lost, not if you have forgotten it at home. In the case of lost documents, the responsible authorities first check who the actual owner of your trailer is. Of course, a sales contract between you and the seller is helpful here and can accelerate the process. In addition, of course, it must also be checked whether the trailer has been reported as stolen. A replacement for the lost documents can usually be requested promptly, the old license plate should be known and the vehicle registration document should ideally still be available.

Safety first: the brakes on the trailer

29. April 2021 um 16:38

Brakes for the trailerBefore every trip with the trailer, you will certainly check your lighting equipment and the locking of the trailer on the towbar, but the wheels and brakes should also be checked regularly. Your trailer will have its own brakes itself if it weighs more than 750 kg. It is set that trailers can only be pulled without brakes up to a maximum permissible total weight of 750 kg. Why is this important? Because, above all, with increasing weight, the braking distance of your combination changes and the trailer infects the vehicle from behind when braking. It practically pushes the towing vehicle when braking, so that the vehicle’s brakes have to be more efficient. At the same time, there is an increased risk of pulling out of the trailer with heavy trailers without their own brake.

The overrun brake

So if your trailer is heavier than 750 kg, a so-called overrun brake is required. This prevents the vehicle from being pushed by the trailer during braking and follows a simple mechanical principle. The overrun brake works like this: When the vehicle brakes, the trailer runs on the vehicle or the trailer coupling. A lever is thrown by the forces that are generated, which in turn releases the trailer’s brakes. The more your car brakes as a towing vehicle, the more the trailer is braked by the overrun brake and the load is distributed over both brakes.

Emergency braking with the breakaway rope

If the trailer should come loose from the ball bar, the overrun brake will of course no longer work. In that case, the breakaway cable is your protection for braking the trailer. You have to attach the breakaway cable to a part of the car that is permanently installed with the vehicle; our MVG trailer hitches have a special eyelet on the cross member to which you can attach the breakaway cable. Otherwise you should use a special holder. When the trailer detaches from the towing vehicle, the pull on the breakaway cable initiates emergency braking and the trailer comes to a standstill. So you should always pay attention to the correct use of the breakaway rope, as it is very important in an emergency.


Safely transporting bikes

12. März 2021 um 16:33

Rear bicycle rack for transporting bicycles
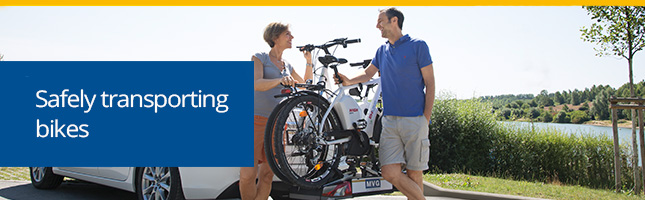
It’s slowly getting nicer outside and you can take a ride on the bikes. Even a more distant round can be easily taken into account with a short transport of the bicycles. Rear bike racks are best for transporting the bikes. What do you have to pay attention to with your rear bike carrier?

The number of bikes in transport

With each rear bike carrier model, it is precisely specified how many bikes can be transported with it. On the one hand, every bicycle must have its own rail on the carrier, as this is the only way to ensure secure attachment. On the other hand, the number of bicycles is also relevant in terms of weight. After all, the rear bicycle racks are not only designed and tested for a certain number of bicycles, but also for their weight. If, for example, baskets or bags are still attached to your bicycles, it may be advisable to remove them in terms of weight.

The compatibility of the trailer hitch

Rear bike racks, which have a quick-release fastener for mounting on the towbar, are very easy to use. You can also see this in our German video.

YouTube

Mit dem Laden des Videos akzeptieren Sie die Datenschutzerklärung von YouTube.
Mehr erfahren

Video laden

As a rule, such closures are compatible with the common towbars, so that there are no problems for you.
If you don’t have a trailer hitch, you can of course also attach a bike rack to your tailgate or, for example, transport the bikes on the roof.

Loading and securing the load on the rear bike rack

Safe loading is also very important for a safe journey. As already mentioned above, you should always keep an eye on the permitted values ​​for load and weight. Also make sure that you always secure the bikes well. On the rear bicycle racks from our shop, fastening devices are provided in the wheel shells as well as a device for fastening to the frame of the bicycle. In this way, your bike will be fixed in three places. You should attach the fastenings tightly and – if possible – lock them so that everything is lashed as well as possible. At the same time, everything that is attached to the bike (such as bags or baskets) should be removed. These items are often bulky and prevent the bikes from being securely attached to the rear bicycle rack.

When is a warning sign necessary during your drive with a trailer?

10. Februar 2021 um 15:44

 Warning signs for driving with a trailer
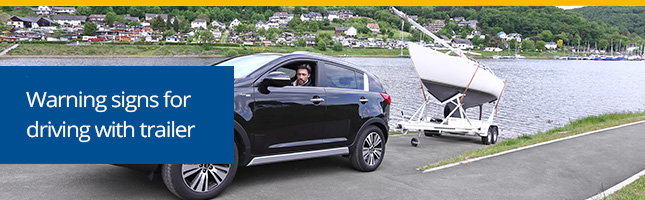
If you load your trailer, you may have to attach a warning sign to the trailer, of course this must be done before the journey. But in which cases is a sign required and what should it look like?

Red flag as a warning sign in the event of a towering load

The maximum length for your team is specified in the road traffic regulations and must not exceed 20.75 meters. At the same time, the width and height are also defined and important values ​​that you should consider when driving. With the exception of agricultural and forestry vehicles, normal vehicles and their cargo must not be wider than 2.5 meters and not higher than 4 meters. The load must not protrude to the front, this is only allowed for vehicles that are higher than 2.5 meters. But even then, the load may only protrude forward by half a meter.

If you are transporting cargo that protrudes to the rear, an overhang of 1.5 meters is still permitted. However, loads that protrude more than 1 meter beyond the reflector must be labeled. For this you need a red flag. This must be 30×30 cm. A red, cylindrical body with a diameter of 35 cm is also permitted. You have to attach both below a height of 1.5 meters so that it is visible to the following drivers in traffic.

Warning signs for trailers and rear bike carriers

If your trailer is too long, red and white warning signs are required. When you buy a new trailer, these are in most cases pre-assembled. Otherwise you can reorder them online.

Such warning signs are also compulsory in some countries when using the rear bicycle rack. In Spain and Italy for example, you have to mount a warning sign on the rear bike rack. This is also red and white, square and usually made of aluminum. If you do not mount the warning sign and are checked at a traffic control, you will be charged a penalty. Since the regulations for these warning signs are not uniformly regulated across the EU, you should definitely inform yourself before going on holiday abroad in order to avoid these sometimes sensitive penalties.

Check up for the towbar: Keep these points in mind every year

28. Januar 2021 um 15:03

Check up towbar

What should you pay attention to as part of an annual check-up – regardless of whether you travel a lot with the trailer or whether you drive less with it? We have put together the most important points for the annual check-up of your towbar, after all, your towbar accompanies you all year round and in the true sense of the word.

For detachable towbars: cleaning the mount

If you have a detachable trailer hitch, then rinse the coupling for the towing hitch, i.e. the sleeve into which you insert the ball rod during assembly, once a year with some water. There used to be a so-called protective plug that prevented the sleeve from being contaminated. This plug is no longer required due to a product optimization of the intake. A simple rinse is sufficient, as the holder is now designed in such a way that, in principle, significantly less dirt can adhere to it.

If you’ve been off-road, of course, after such a trip you should take a look at the towbar anyway, rinse it off briefly and, if necessary, check whether there are any small branches or mud crusts in the mount.

Functional test of the removable and swiveling towbar at the check-up

If you travel a lot with the trailer or the rear bike carrier, then you already use your trailer hitch a lot and use all functions regularly. However, if you have not used the trailer hitch for a longer period of time, it is advisable to assemble and disassemble both a detachable and a swiveling towbar from time to time. In this way you can rule out that processes may no longer go well or that something gets stuck in the automatic system of the towbar. This is also good for the lock of the trailer hitch, at the same time you know your way around the product better and are prepared for every journey.

Where is the spare key?

If you order a trailer coupling, we will supply you with two keys with every detachable and swiveling trailer coupling. These are for the theft protection of the towbar. One of the two keys is intended as a spare key. You should keep it in a fixed place and best of all with a key fob, as the keys have a red handle, but are still quite small.

Remove the trailer coupling when not in use and stow it safely

If you do not use your towbar, it is advisable to always remove it or to fold it in with the swiveling towbar. A rigid towbar naturally remains on the vehicle. By removing it, you reduce the risk of damage to the trailer coupling in the event of a possible rear-end collision. Otherwise the towbar would have to be completely replaced, and many insurance companies also require the trailer hitch to be folded in or removed when not in use.

To safely stow the detachable ball rod, we provide you with a practical bag in which you can store the ball bar in the trunk, for example. Make sure that the towball cannot fly around in the trunk, for example when driving or braking.


The axle load: 8 facts you need to consider

13. Januar 2021 um 11:11

Axle load
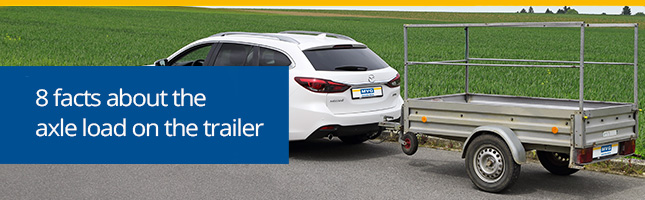
What is the axle load and what do you need to know? We have summarized the most important information for you and give you a brief overview. Of course, this most important information also include a few tips on driving with a trailer and to what extent the axle load can influence the behaviour of your car/trailer combinationwhen driving.

  1. The axle load is defined as the load that presses on the axle of the vehicle. It is transmitted from the wheels of an axle to the road.
  2. It can basically be calculated simply as follows: The curb weight plus payload, i.e. the actual mass, is divided by the number of axles and then gives the value of the axle load. This is given in tons, all axles should always be evenly loaded.
  3. If your trailer only has one axle, this also means, conversely, that the load is then partly on the trailer coupling and must be carried there as a vertical load.
  4. For your journey with the trailer, you have to comply with the permissible axle load as well as the permissible total weight of the vehicle and the trailer.
  5. A distinction is made between technical and legally permissible axle loads. The former is always related to a specified vehicle and defined in the vehicle documents. You can find it under point 7 in your registration certificate. The legally permissible load for the axle is then specified under point 8. In old vehicle registration documents, only the legally permissible value is usually specified; if both values ​​are specified, the lower value is decisive.
  6. The axle load is binding and must not be exceeded. It is the decisive value if, for example, a possible overload should be checked during a traffic control.
  7. In order to avoid a broken axle, you should always keep a close eye on the load and avoid an overload. On the other hand, you should always load the cargo evenly, this prevents breakage. You can read how the correct loading works in our article.
  8. In addition to the values ​​recorded in the vehicle registration document, there are also statutory provisions for the maximum axle load. This is §34 of the German StVZO. The values ​​given there apply to all trailers with rubber or pneumatic tires. For motor vehicles and trailers with pneumatic tires, the load is set to the following values ​​(for further information see §34 StVZO):
    • load for single axles: 10 t
    • Load with driven single axles: 11.5 t
    • Load with a double axle and a center distance less than 1.0 meter: 11.5 t
    • Load with double axle and a distance of 1.0 to 1.3 meters: 16 t
    • Load with double axle and a distance of 1.3 to 1.8 meters: 18 t

Donation handover to Kinderschutzbund e.V. Ortsverband Eschweiler

7. Dezember 2020 um 15:22

Kinderschutzbund e.V.At MVG, we are happy to make a social contribution every year and like to stand up for others in our everyday lives. We are particularly pleased to support the Kinderschutzbund e.V. local association Eschweiler this year and raise the Christmas spirits among the children there. The chairmanship of the local association, Mrs. Kaleß (front right in the picture), was on site together with the educational management, Mrs. Karbig (front left in the picture), and accepted the donation from Mr. Christoph Pütz and Mr. Michael Pütz (members of the management, back left and right in the picture).

The Kinderschutzbund e.V. has been campaigning for the future of children across Germany for many years. The principle for the work of the Kinderschutzbund e.V. is “Support parents, protect children”. Among other things it focusses on children’s rights, works with families as well as for the social security of children and takes a stand for a non-violent everyday life for children.

The commitment of the Kinderschutzbund e.V. on site

The Kinderschutzbund e.V. in the Eschweiler local association also follows this principle. Under the chairmanship of Mrs. Kaleß and the educational management of Mrs. Karbig 640 children are cared for every day at 5 primary schools. The local association is active in the morning and all-day care of children. The association is supported in looking after the children by young educators who have the opportunity to complete their training in the facilities of the local association.

“Unfortunately, this year the training places for many future educators are at risk due to COVID-19. We are particularly pleased to be able to support the trainees as well, and to enable some of these trainees to do an apprenticeship with us at short notice, ”explains Mrs. Kaleß. The apprentices can also contribute to the care of the children during the holidays, which the Kinderschutzbund e.V. local association Eschweiler offers: “We have various offers, we like to surprise the children and offer something special. So sometimes a clown comes along, or they have the opportunity to take part in learning circus lessons themselves. “

Would you like to find out more about the work of the Kinderschutzbund e.V. Local Association Eschweiler? You can find out more on their website (in German).

The requirements for your trailer driving license

24. November 2020 um 14:19

 Trailer driving license
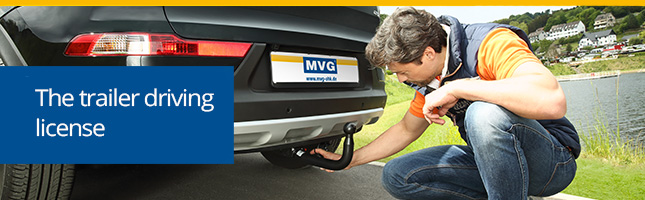
Some time ago we reported on the various driver’s licenses for driving a trailer. In addition to the old class 3 driver’s license, there is also the class B driver’s license, which replaced the class 3 license and with which driving a trailer is possible. In addition to B, you can also pull larger trailers with a class B96 and BE driving license. What requirements do you have to meet for the respective trailer driving license?

In order to get a class B driving license, you can register at the driving school six months before you turn 17 – provided you choose to be accompanied by a driver. In addition to theoretical training in the form of lessons and a completed written exam, practical driving lessons and a final exam in practical form are required. For the test you must be at least 18 years of age (17 years for accompanied driving) and present an eye test and a first aid certificate.

The trailer driving license: what types are there?

Normally, the trailer driver’s license is only obtained afterwards, it is often helpful to have a little driving experience. No further theoretical test is then required for the class BE driving license, but at least five hours of practical training are required. These would have to take 45 minutes and each include a motorway trip, a night trip and three cross-country trips. The subsequent driving test takes 45 minutes. A class B driver’s license is compulsory in order to obtain the trailer driver’s license.

If the class B and BE driving license are taken together, the usual theoretical and practical driving lessons are first completed. In addition, 12 hours of practice with the trailer must then be proven, including three night drives, four motorway drives and five cross-country journeys.

For a class B96 driving license, the minimum age is also 17 or 18 years. An examination does not have to be theoretical or practical, as the learning driver only has to prove the required, specified number of training hours. This includes at least 150 minutes in theory, 210 minutes in practice and 60 minutes in driving experience.